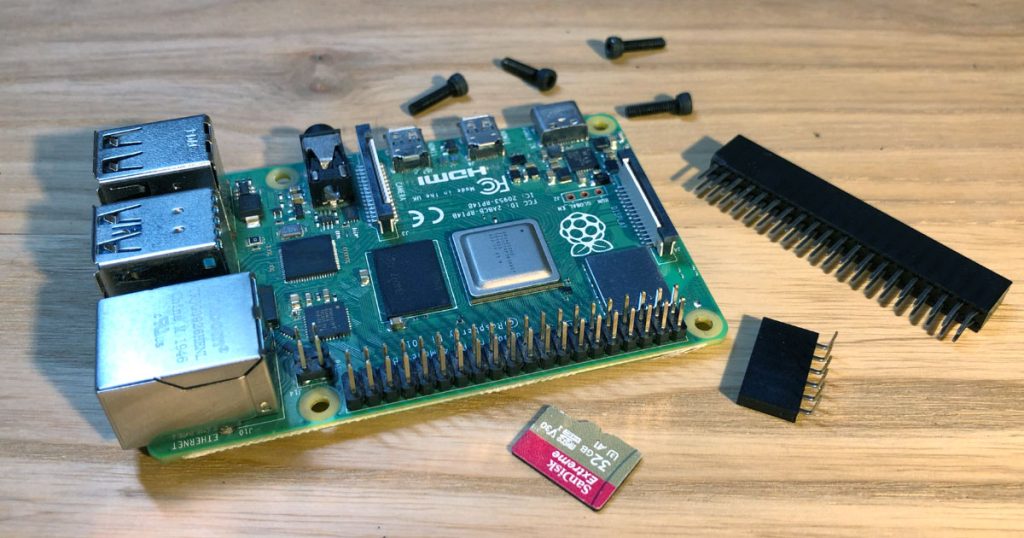
ラズパイをいろんな方法で操作する
 ねこっぴ
ねこっぴ普通の操作以外の方法も便利に使えるのでセットアップしていくにゃよ。
- 普通にモニターをHDMIでつなぎ、マウスとキーボードをUSBで使う
- モニターはHDMIでつなぎ、マウスとキーボードをネットワークでパソコンと共有する
- VNC (Virtual Network Computing) でパソコンなどから遠隔操作をする。
- SSH (Secure SHell) でパソコンなどから遠隔操作をする
 ぴぽこ
ぴぽこしらべました。Secure Shell(セキュア シェル、SSH)は、暗号や認証技術を利用して、安全にリモートコンピュータと通信するためのプロトコル。パスワードなどの認証を含むすべてのネットワーク上の通信が暗号化される。Virtual Network Computing(ヴァーチャル・ネットワーク・コンピューティング、略称VNC)は、ネットワーク上の離れたコンピュータを遠隔操作するためのRFBプロトコルを利用する、リモートデスクトップソフトである。とのことです。
ねこっぴさっぱりわからんにゃ。 VNCは遠隔で画面そのまま操作、SSHは暗号化で安全。遠隔でコマンドで操作 ってイメージ。難しいことはおいといてVNCは画面で操作、SSHはコマンドで操作ってことで 進めます!!
普段はパソコンからVNCでラズパイを遠隔操作。しかし慣れないLinux操作をやらかしてラズパイにトラブル発生! VNCで画面が出ません! こんなとき、ちびモニターとマウスとキーボードを探してラズパイに接続して…ってやらなくても コマンドで遠隔操作のSSHで簡単になんとかできそうなのに SSHをONにしてなかった、なんてことが番長は何度もあります….。 とくに問題なかったらON設定にしといて良いとおもいます。
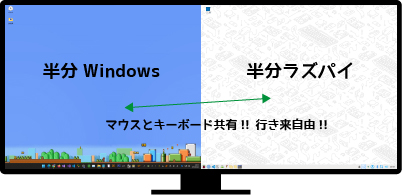
番長んちは最近ハヤリのスーパーワイドモニターを使っています。DELLのやつ。画面をPBPという機能で2分割にでき、winとラズパイを並べてwin側からはX68のエミュ使ってbasic、ラズパイ側はVScodeでpythonなど、すごく便利にマウスとキーボードの共有ソフトを使ってます! もちろん普通のモニター2枚で別々にwinとラズパイ繋いでても使えますよー。この場合だとネットワークで画面映さない分VNCよりレスポンスが良いです!!
遠隔操作をしやすように固定IPの設定をする
ねこっぴラズパイを操作するのにいろいろなパターンで操作できると非常に便利だにゃ。ネットワークで遠隔する場合IPを固定にしないといろいろめんどいからこの設定をしちゃうにゃよ。
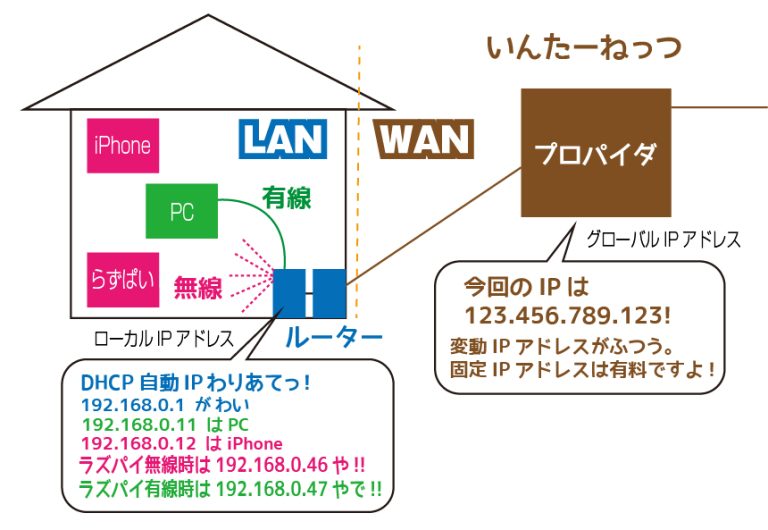
ぴぽこそもそもIPってどんなのか、あらためてちょっと絵にしてみました。
 ねこっぴ
ねこっぴこんななんじなのかなあ。WANはルーターの外LANはルータから中。外から遠隔操作する場合は、プロバイダ側の固定IPの設定をしないとなのと、ルーターのポートを開けたりとかなのでこれまたいろいろめんどうなのだ。なのでLAN内での話に限定するにゃよ。
ぴぽこLAN内のお勉強。ふむふむ。家で使っているよくあるルーターはDHCPという機能でIPを自動で割り振ってくれているのね。自動なだけにラズパイのIPが変わっちゃうことがあるのね。
ねこっぴパソコンなどでラズパイの画面そのまま操作できるVNCとかは、IPとパスワードを入れて操作を開始するからIPがいつも同じじゃないとめんどくさいんよね。
ぴぽこなるほど。じゃラズパイの固定IP設定をしてみましょう!
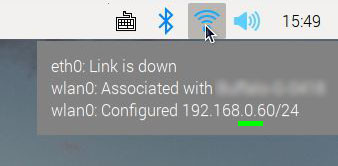
ねこっぴウインドウの右上、タスクバーのネットワークアイコンにマウスをのっけてみてにゃ。IPが表示されるにゃ。上から eth0 有線にゃ。次 wlan0 無線のアクセスポイント。その下に無線のIPが表示されてるにゃ。この緑色の部分の数字はルーターごとに違うにゃ。うちでは0。みなさんの番号を覚えておいてね。
 ぴぽこ
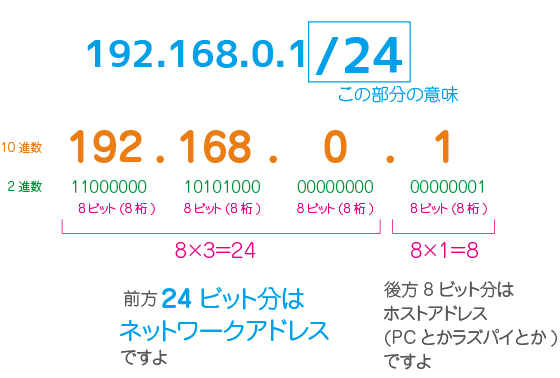
ぴぽこ調べみるとIPの3つ目の数字はセグメント(グループ)ていうのね。そのルーターに繋がる端末は同じ番号になるのね。4つ目はルーターが自動で割り振ってくれた数字とのこと。最後の/24ってなにかしら。
 ねこっぴ
ねこっぴwikiとかいろいろ見て簡単にまとめると、IPアドレスを2進数にした場合の前方24ビット分がネットワークアドレス、のこり8ビットがホストアドレス、みたいな表記の意味らしいにゃ。あんまり気にしなくてよさげ。
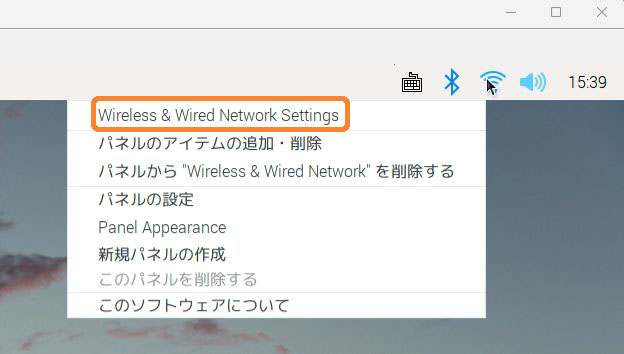
では今度はネットワークアイコンを右クリックにゃ。一番上をクリック。
 ねこっぴ
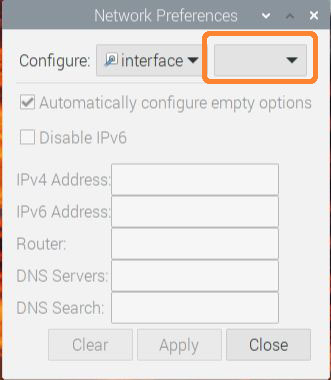
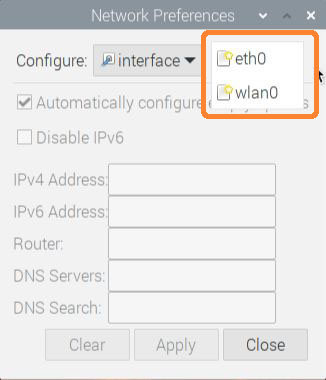
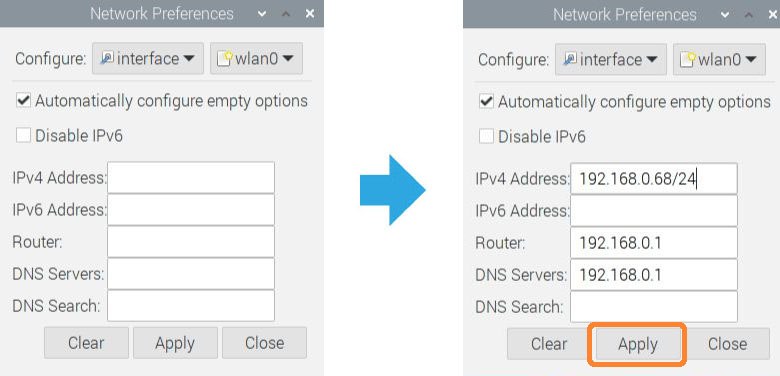
ねこっぴeth0 有線、wlan0 無線 お使いほうをクリックにゃ。ここでは無線のwlan0として設定!
ねこっぴIPv4 Addressの欄は、IPの1つめから3つめまではお使いのルータの番号を。4つ目のさいごの番号は2-254まで好きに決めちゃってよさげ。255はブロードキャストアドレスといって使えないみたいにゃ。Router欄とDSN Servers欄にはルーターのアドレスを入力。通常は4つめが1かにゃ。
 ぴぽこ
ぴぽこたまに被っちゃう (自動で他の電子機器に振られた番号と同じにしちゃったとか) のでおかしかったら変えるのもいいかも。変更完了したらCloseでウインドウを閉じて再起動!
ねこっぴIPが無事固定に変わっているかの確認は、次のVNC/SSH設定の項目するにゃ。
ぴぽこおっけー!
「IPv6」はインターネット送受信の新しいルール。番長んちもIPv6を使えるようにはしてあるのですが、いろいろトラブルが出たりでめんどいのでIPv4のまま使っています。調べてもまともに書けそうになかったので華麗にスルーします。
ラズパイのVNCの設定 (画面そのまま遠隔)
ねこっぴではVNCの設定をしていくにゃよ。SSHのスイッチもついでにONにします。
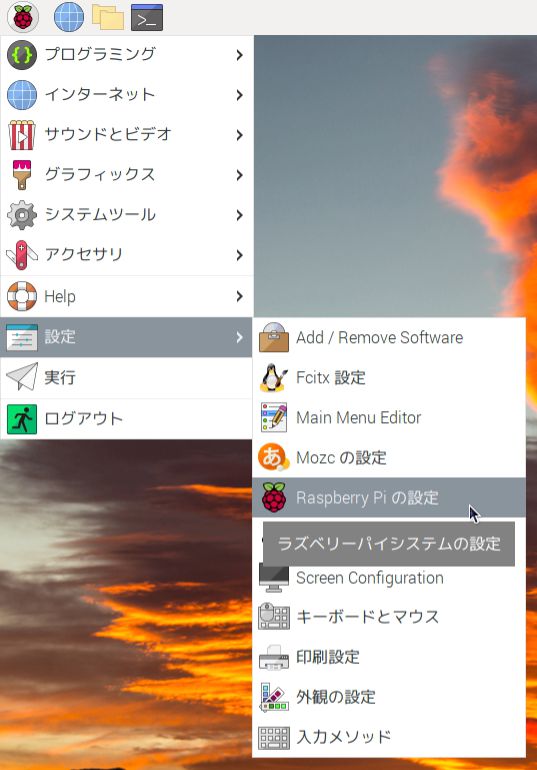 ねこっぴ
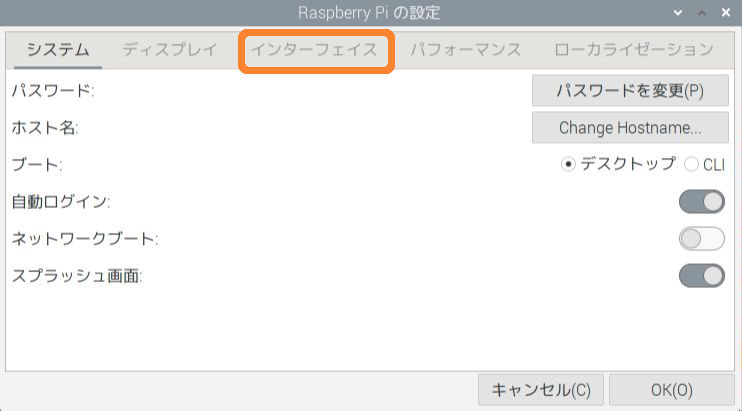
ねこっぴウインドウが出たらインターフェイスをクリック!
 ねこっぴ
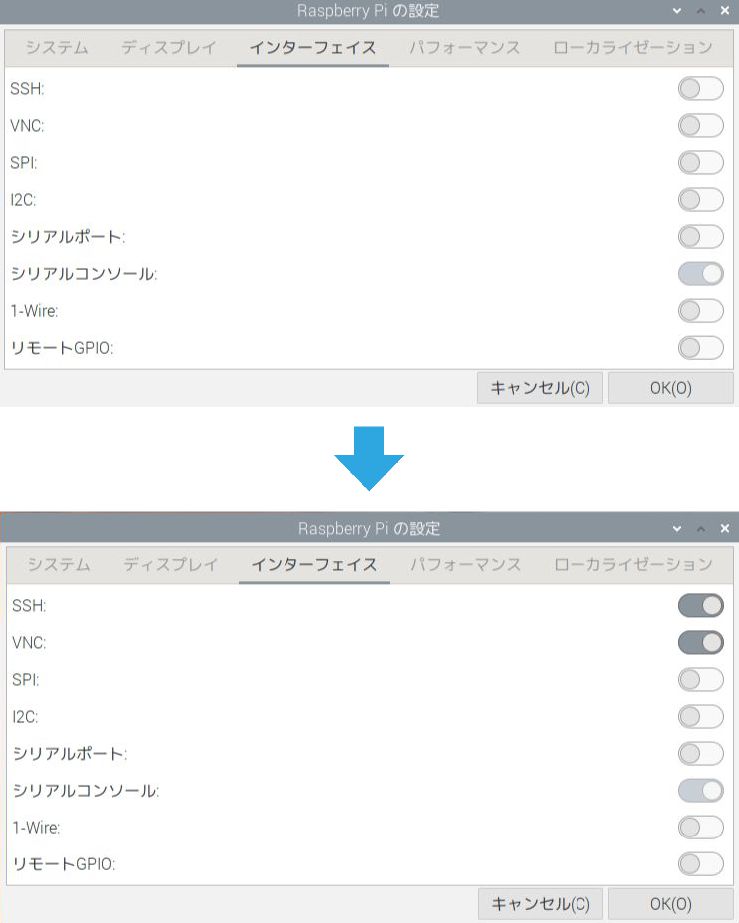
ねこっぴVNCとついでにSSHもONにするにゃ。
 ねこっぴ
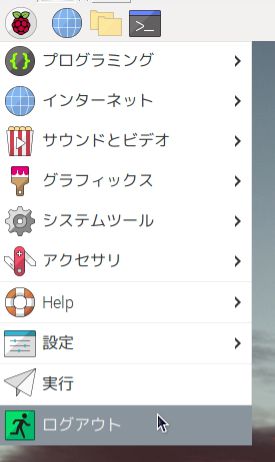
ねこっぴ再起動ー!
 ぴぽこ
ぴぽこ再起動したらVNCマークでましたー! V2に見えるけど。
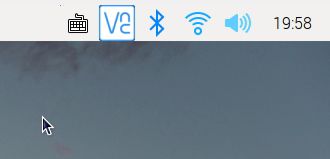 ねこっぴ
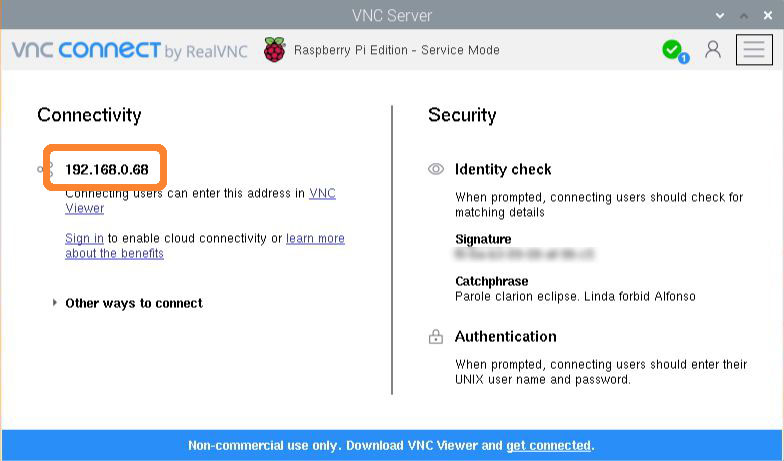
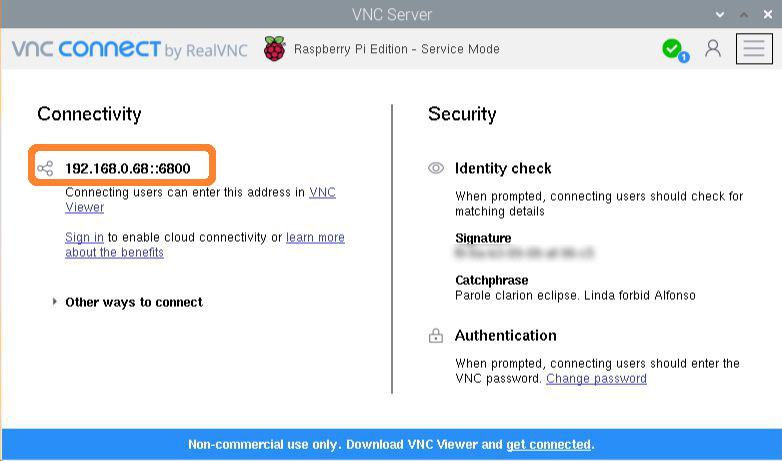
ねこっぴアイコンの上で左クリックすると情報が見れるにゃ。固定設定したIPになってるの確認にゃ!
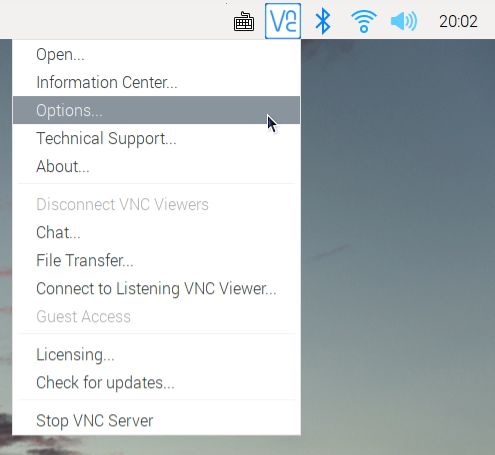
 ねこっぴ
ねこっぴアイコンの上で右クリックするとメニューが出るにゃ。Optionsを選択。
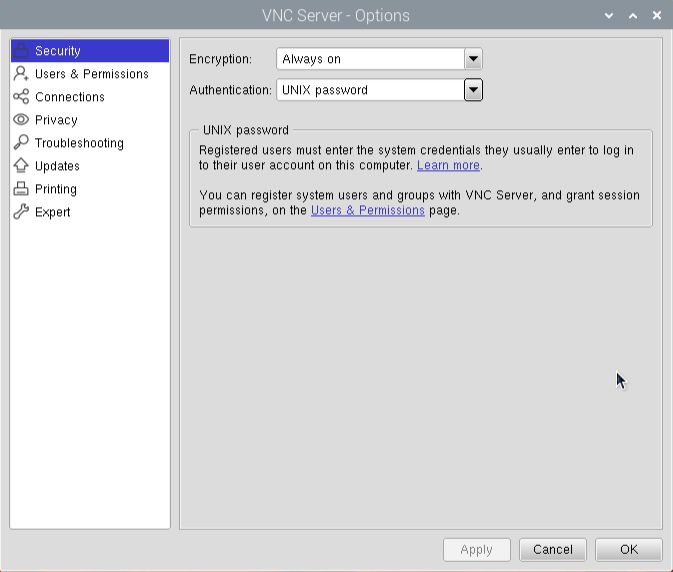
 ねこっぴ
ねこっぴOptionsウインドウが出ました。この最初のSecurityの項目、いろいろ注意があるにゃ。
ぴぽこなんの注意かしら??
ねこっぴ重要なのはAuthentication(認証) という項目を UNIX password からVNCpasswordに変えることなんだけど、操作する側のマシンによってEncyption(暗号化)の項目も変えなきゃなのです!
 ぴぽこ
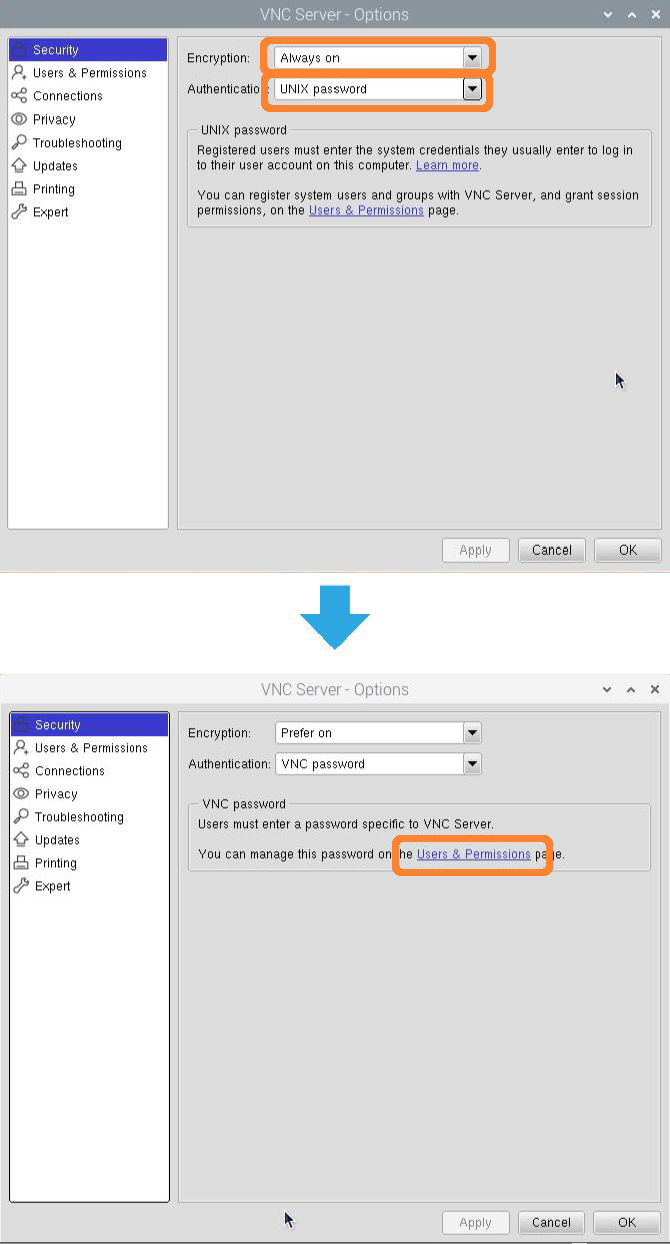
ぴぽこAuthentication(認証)はVNCpassword変更必須なのね。……Encyption(暗号化)をAlways on(常にオン)で進めていくと iPadからは遠隔できるけど、windowsのUltraVNCじゃ繋がらないわねー。
ねこっぴwindowsでUltraVNCを使おうと思ってるので、これからその設定をしますが、操作側をiPadにするなら Always on でも良いと思います。続けるにゃー!
 ねこっぴ
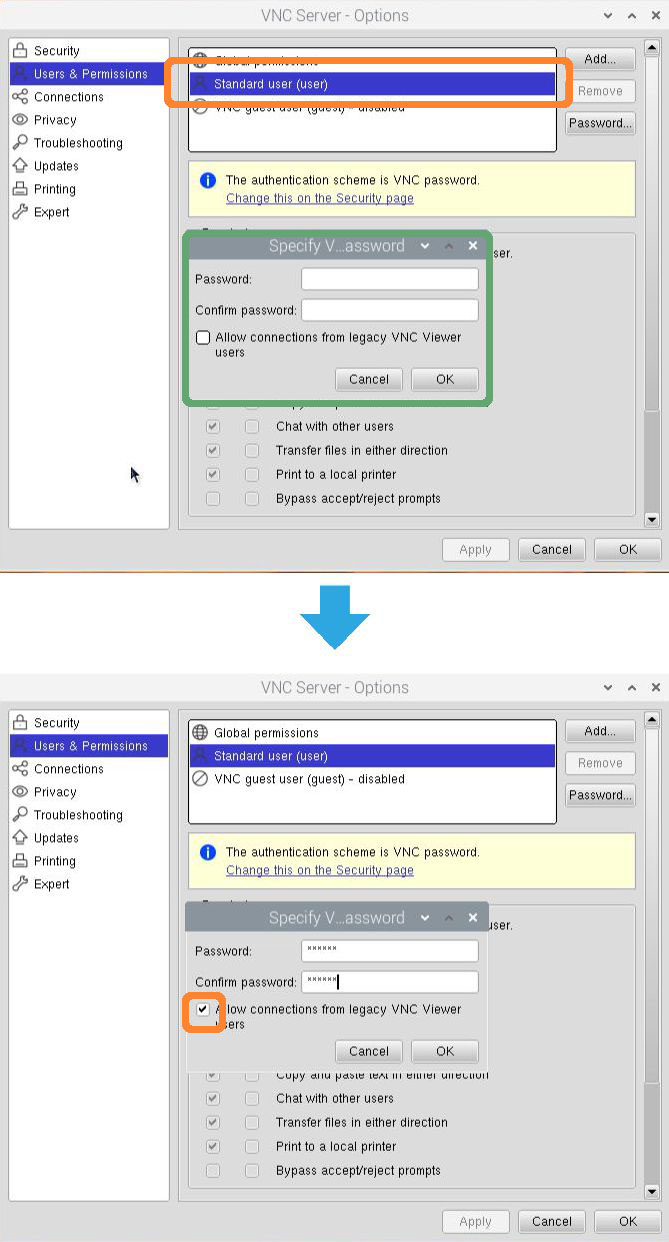
ねこっぴEncyption(暗号化)を Prefer on にします。 Prefer on = 暗号化できるときはするみたいな感じらしいです。次は Users & Permissions をクリックしてパスワードの設定。Standard user (user) をダブルクリックするとパスワード入力ウインドウが出てくるにゃ!
 ねこっぴ
ねこっぴパスワードを入力。パスワード確認でもう一回入力。Encyption(暗号化)を Prefer on にしてあると、Allow connections from legacy VNC Viewer users というチェック項目が出現します。忘れずにON!
ぴぽこAllow connections from legacy VNC Viewer users 。従来の VNC Viewer ユーザーからの接続を許可する。google翻訳より。
ねこっぴwindowsのUltraVNCでラズパイを操作する場合は Prefer on にして パスワード入力時の Allow connections from legacy VNC Viewer users に チェックをする。
ぴぽこ力強くメモしてきましたね….。legacy…。
きっと結構な時間ドツボったのでしょう。
 ねこっぴ
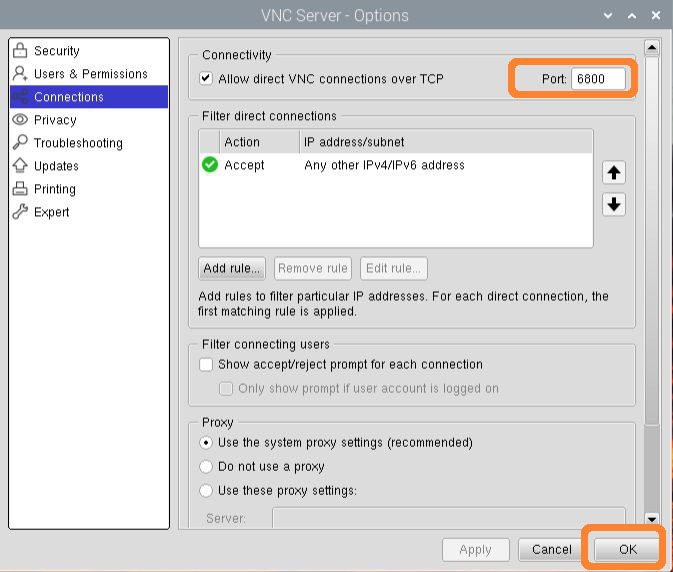
ねこっぴ最後はポートを入力。初期設定では5900番。自分仕様に変えといたほうがよいかも。最後にタスクバーのVNCアイコン左クリックで変更できてるか確認して、ラズパイのVNC設定は終了ー! windows側にいくにゃ!
ポート番号49152番から65535番までを動的・プライベート ポート番号(DYNAMIC AND/OR PRIVATE PORTS)と呼びます。 この範囲のポート番号は、誰でも自由に利用できます。
google検索の一番上に出てきた 己で解決!泣かぬなら己で鳴こうホトトギス さんより引用
windowsにUltraVncをインストールしてラズパイと接続する
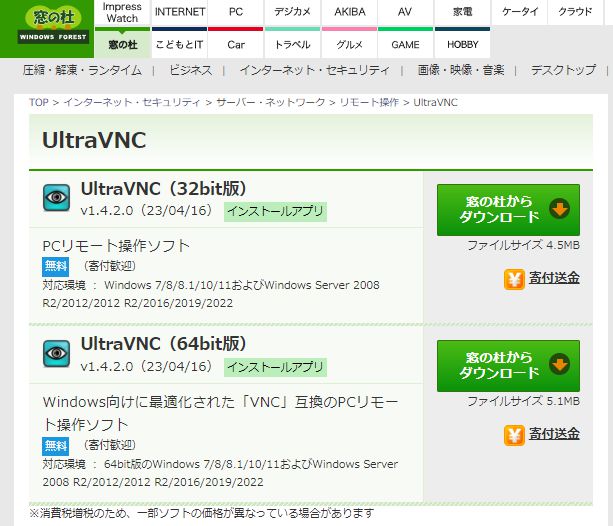
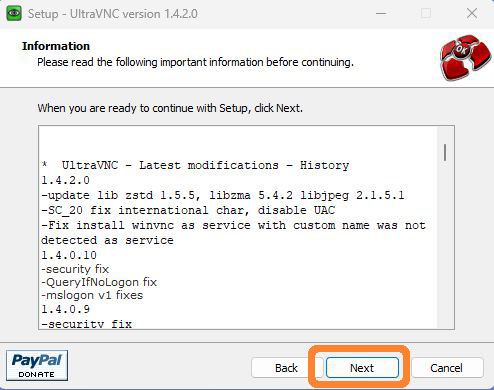
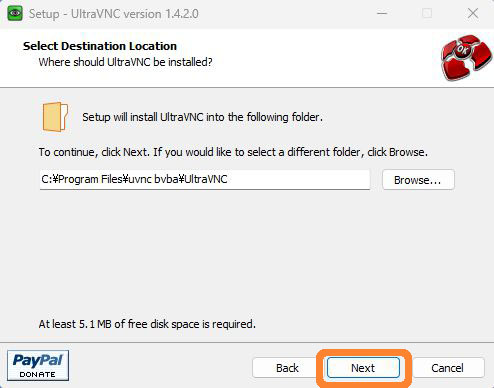
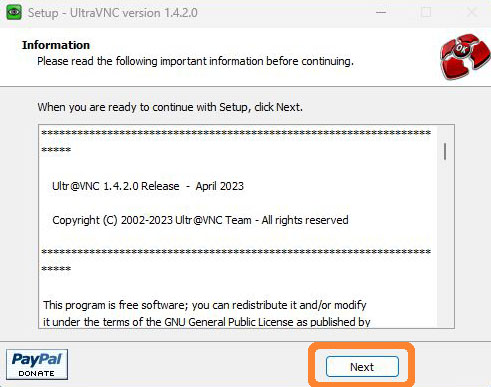
ねこっぴ窓の杜 「UltraVNC」PCリモート操作ソフト からUltraVNC 64bit版を落とすにゃ。ダウンロードしたファイルをダブルクリックして起動!

 ねこっぴ
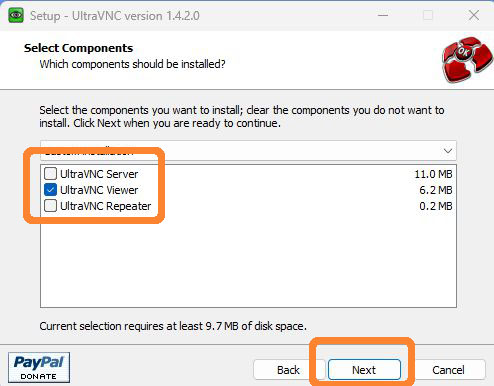
ねこっぴ今回はwindowsからラズパイを動かす、ということでビューアーのみインストールするよ!
 ねこっぴ
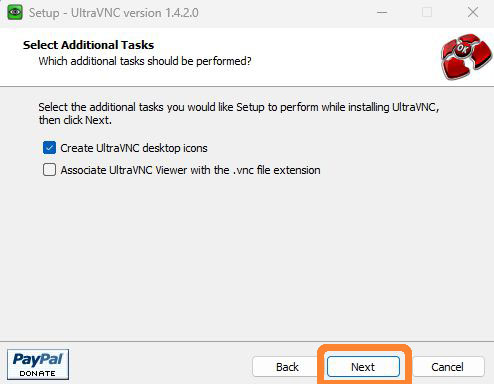
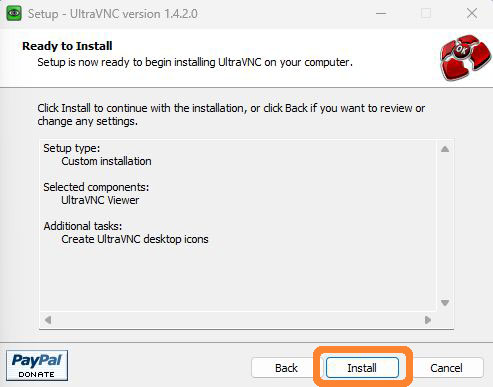
ねこっぴデスクトップにアイコンつくる場合はチェックにゃよ。
 ねこっぴ
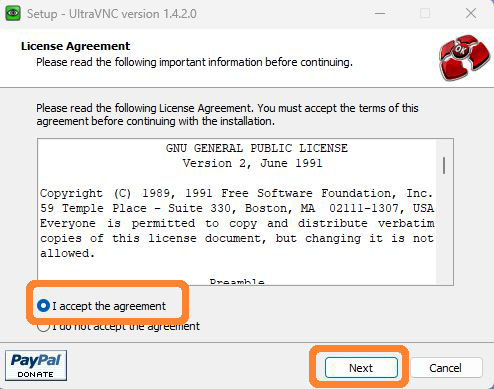
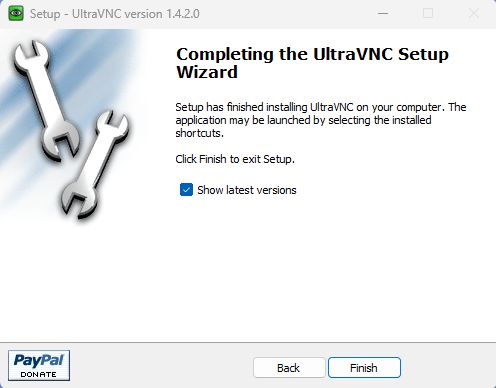
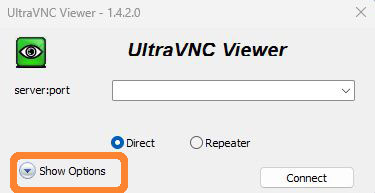
ねこっぴUltraVnc起動にゃー! 起動したら Show Optionを押します。
 ねこっぴ
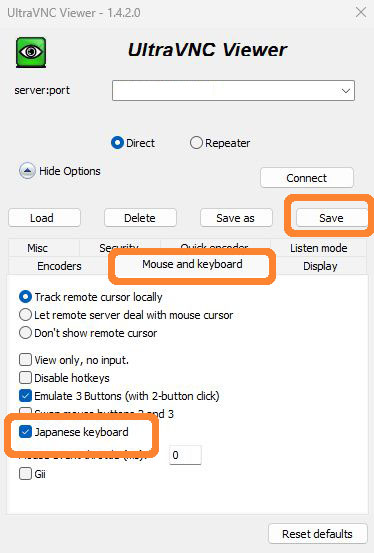
ねこっぴMouse and keyboard タブの中の Japanese Keyboardにチェック。セーブしたらHide Option で再度隠しても良いにゃ。
 ぴぽこ
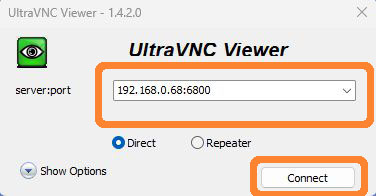
ぴぽこやっと準備完了です! IPとポートを入力して Connectしますね!!
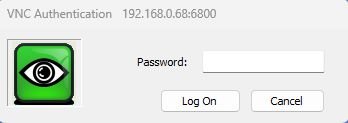
ねこっぴIPとポートの間は「:」入れてね。 192.168.0.68:6800 こんな感じにゃ! パスワード入れて LogOn で接続されるにゃよ!
 ぴぽこ
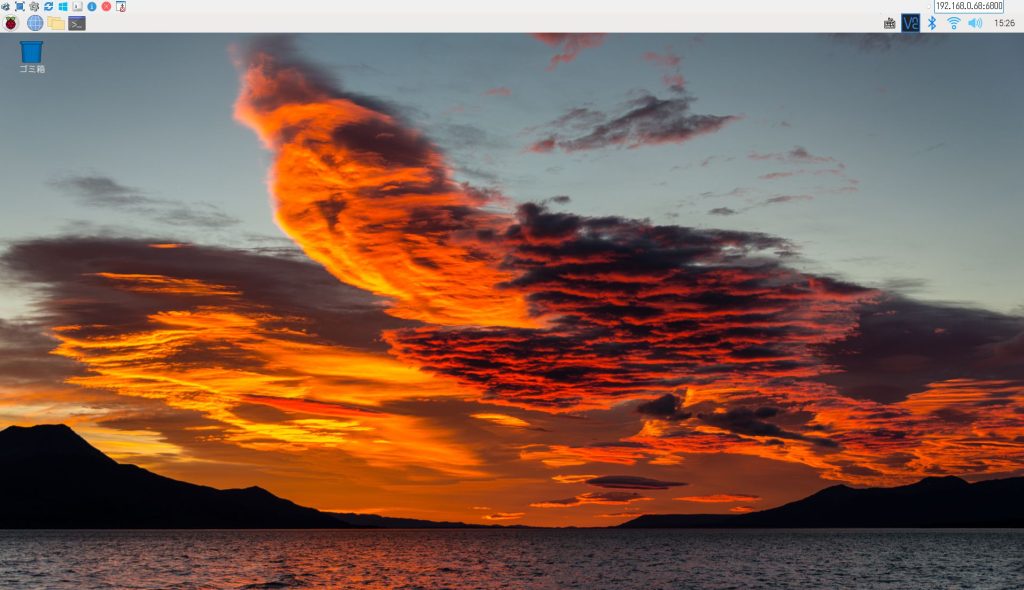
ぴぽこつながりましたーー!! VNCアイコン色変わってるねー。
ねこっぴVNCのウインドウにツールバーがあると邪魔だなーってひとは、
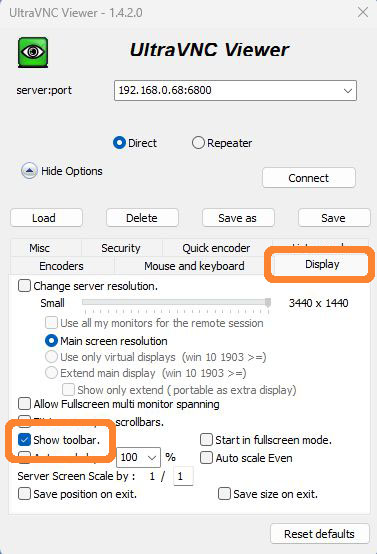 ねこっぴ
ねこっぴOption画面の Displayの中の Show toolber のチェックをはずすとスッキリするにゃよ! あと、最後にひとつやることがあるにゃ。
ぴぽこやること?
ねこっぴラズパイで日本語入力をするとき、操作してるマシンの入力環境をそのままにVNCでの操作もOK、ラズパイに直接USBでキーボードを挿して操作してもOKにするには、設定 → Fcitx設定の
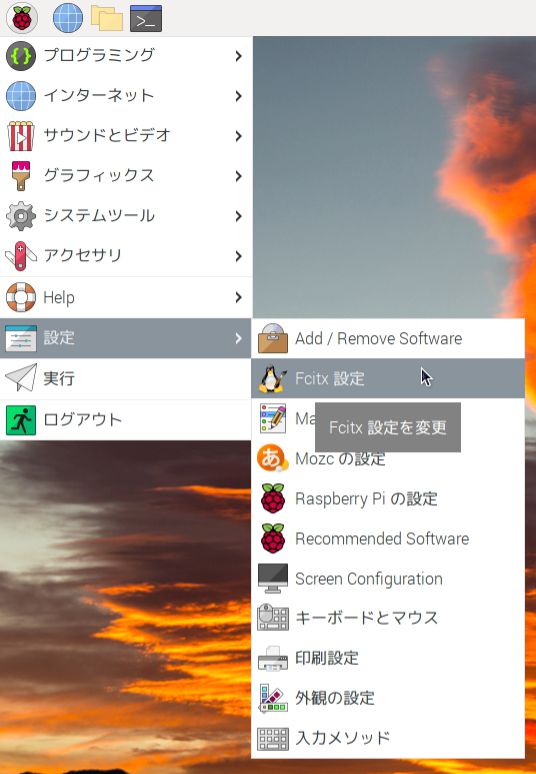 ねこっぴ
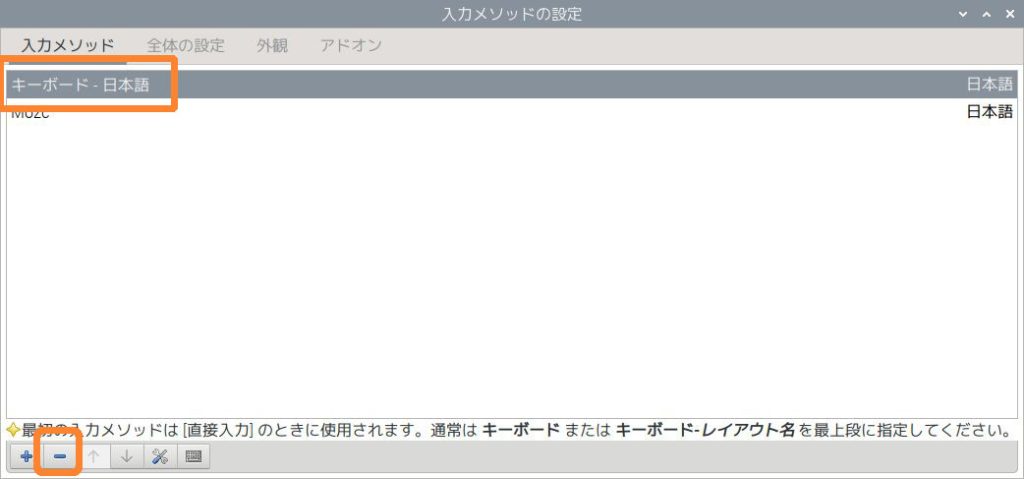
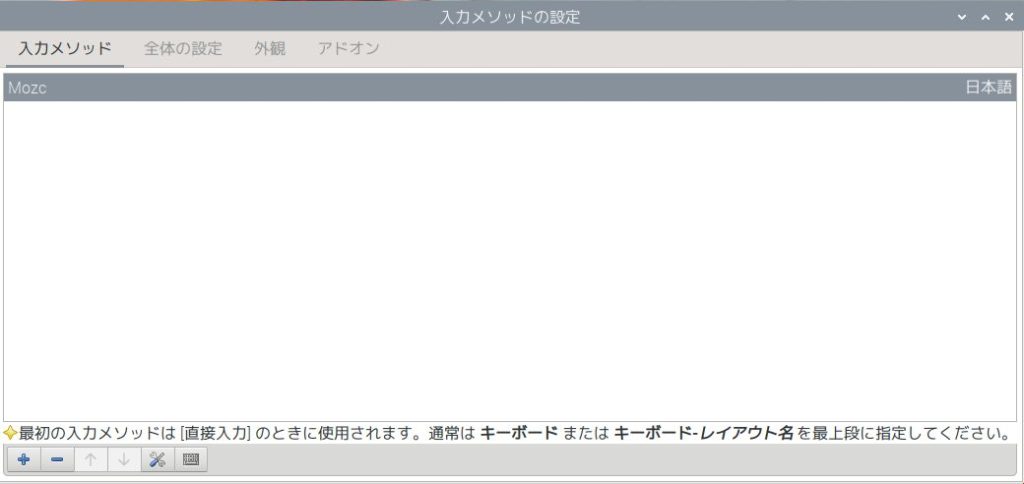
ねこっぴ入力メソッドで現在2つ 「キーボード – 日本語」「Mozc」と出てると思うんにゃけど、「キーボード – 日本語」をマイナスアイコンで消してmozcだけにすると安定するにゃ。これ、どこみても書いてなくて、あってるのか正直わからないにゃ。
 独学番長 ネットのねこぽんさん
ぴぽこばんちょーちわーっす。
ねこっぴと、いうことで、引き続き今度はWindowsにSSHで操作できるソフトを入れるにゃ!
ラズパイのSSHの設定 (コマンドで遠隔)
ねこっぴもくじからすっ飛んで来たひとのために一応もっかい貼っときます。
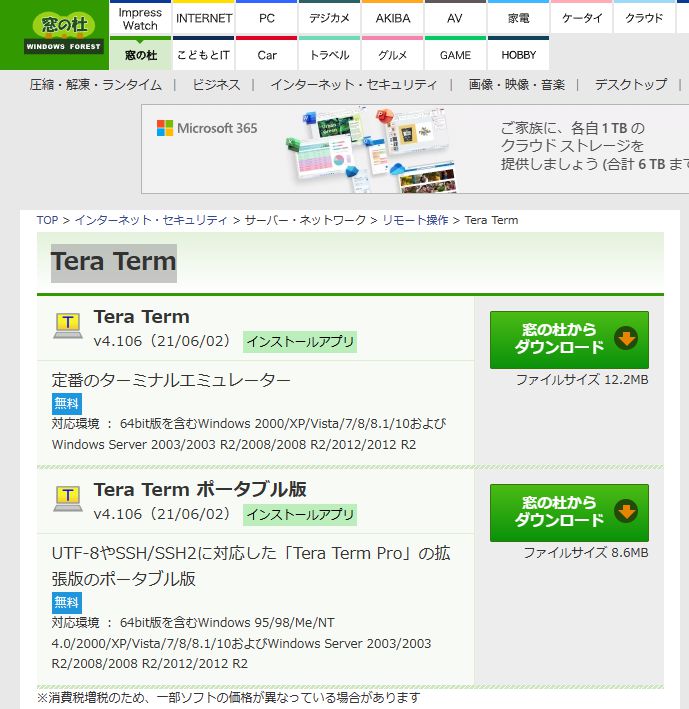
windowsにTera Termをインストールしてラズパイと接続する
ぴぽこTera Termってどんなソフトなの?
ねこっぴSSHでの操作、シリアル通信とかができます! 本編のX68000Z-UARTであそぼう!では使ってないけど、パソコンで起動してるX68000エミュレーターXM6と繋いだラズパイのシリアル通信もできちゃう!
ぴぽこ……よくわかんないけど便利そうね!
窓の杜 Tera Term からTera Termをダウンロードしますねー。
 ぴぽこ
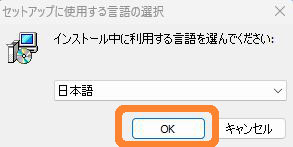
ぴぽこダウンロードしたファイルをダブルクリックして起動しましたよー
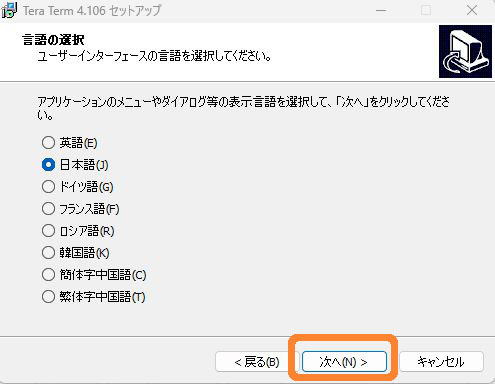
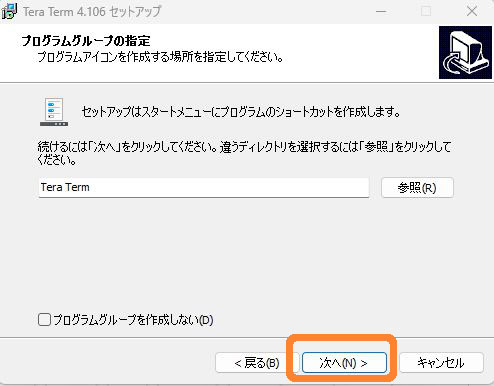
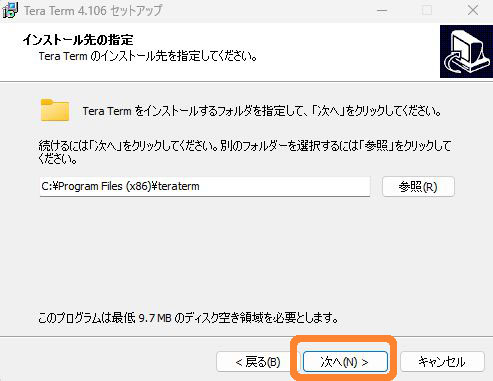 ねこっぴ
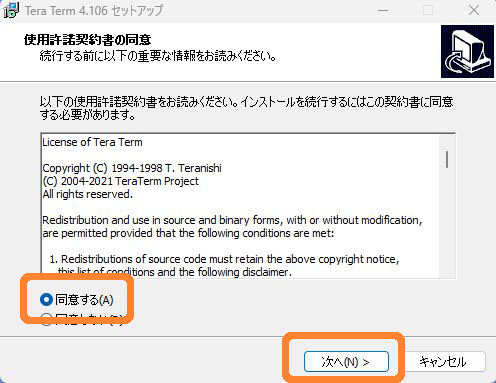
ねこっぴインストールするコンポーネントはそのまま次へでいいかな

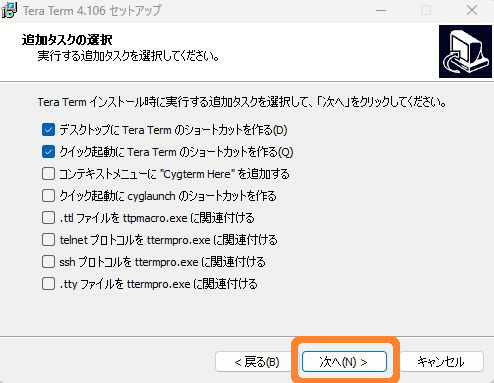
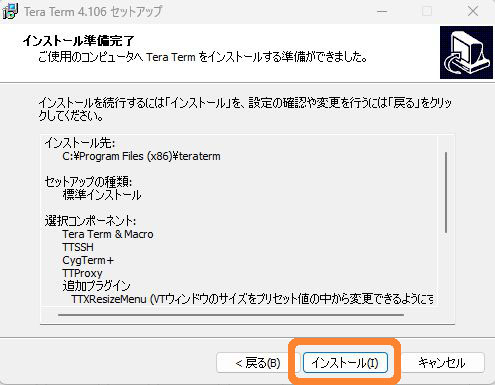 ねこっぴ
ねこっぴ今すぐ Tera Termを実行するにチェックいれました。起動!

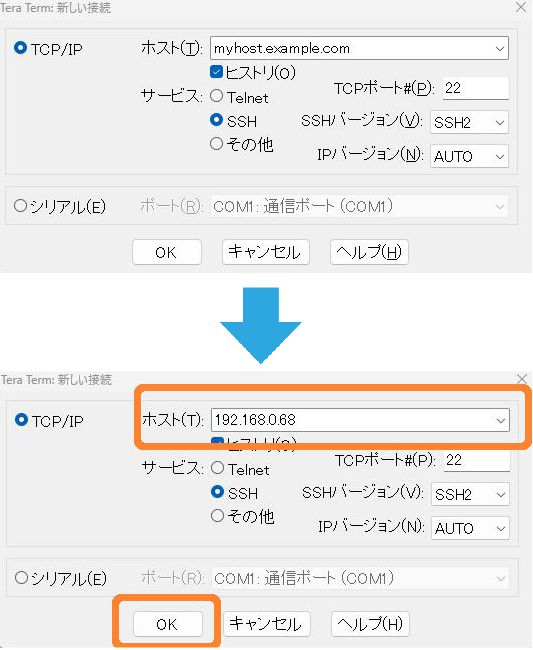
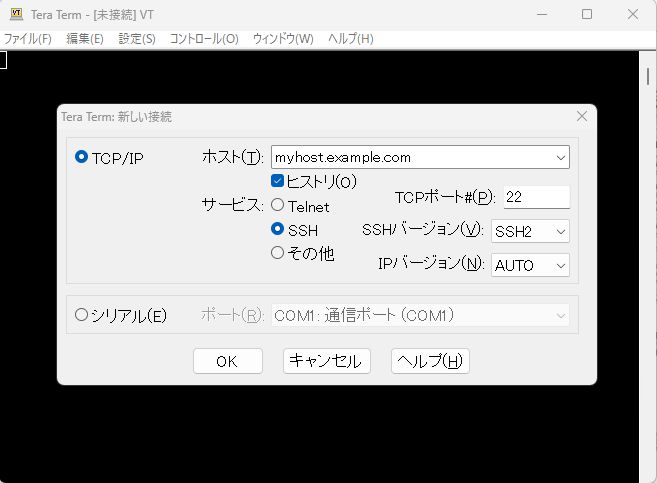 ねこっぴ
ねこっぴホスト欄に、固定したIPをいれますよー。ポートは別欄にありますがこの22のままでOKです!
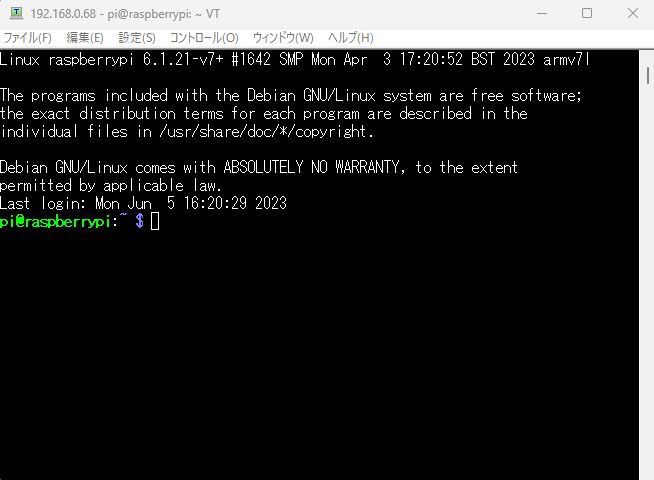 ぴぽこ
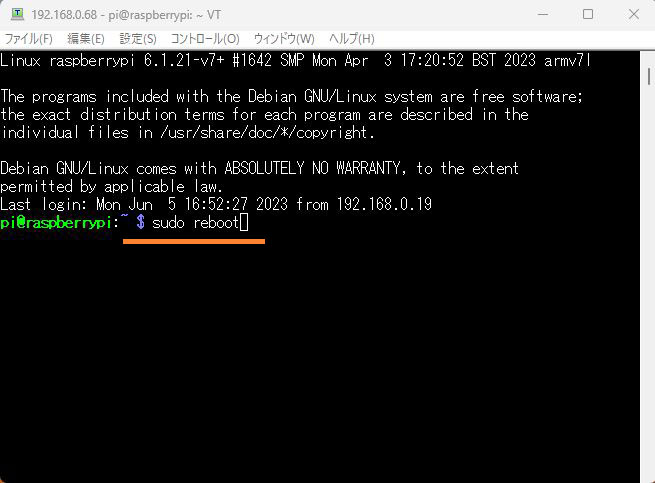
ぴぽこコマンド入力状態になりましたー! 繋がったみたい。
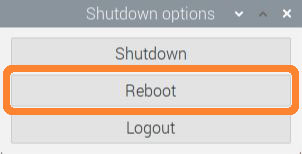
ねこっぴラズパイをコマンドで再起動してみるにゃ! sudo reboot って打ち込んで Enter押してね。
ぴぽこsudo って管理者権限で 再起動ってことなのね。OKー!
 ねこっぴ
ねこっぴラズパイをVNCで繋いでいる方もモニターで繋いでいる方も、画面みてると再起動されている様子がわかりやすいと思うにゃよ。コマンド操作は少し敷居高いけど困ったときにはSSH操作で助かること多いにゃ!