注意! 実験は自己判断でお願いします。
作業は自己責任でお願いいたしますです。
 うさっぴ
うさっぴ注意だぴょん。自己責任にてお願いするだぴょん。
当サイトに掲載された内容によって生じた損害等の一切の責任を負いかねますのでご了承ください。だぴょん。
※このブログについてのプライバシーポリシー
 パンだ
パンだあくまでこのブログの主の番長は独学でトライアルアンドエラーを繰り返してるだけの素人だパンだ。ときにはしくじって電子機器をぶっこわしたりもしています。ご理解いただいた上でお楽しみくださいだパンだ。
 くま
くまヤフーオークション出品のX68uartRasModuleを落札の際も、
実機のサポートできません! だクマ。
実機でテストを繰り返したくないのが理由だクマ….
 ねこっぴ
ねこっぴこのブログに間違えがある可能性もあるにゃ。
X68uartRasModuleに問題がある場合もあるにゃ。
一応、試したという記録だけつけておくにゃ。
実行する場合はほんと自己責任でお願いします。
 ぴぽこ
ぴぽこよろしくおねがいします。
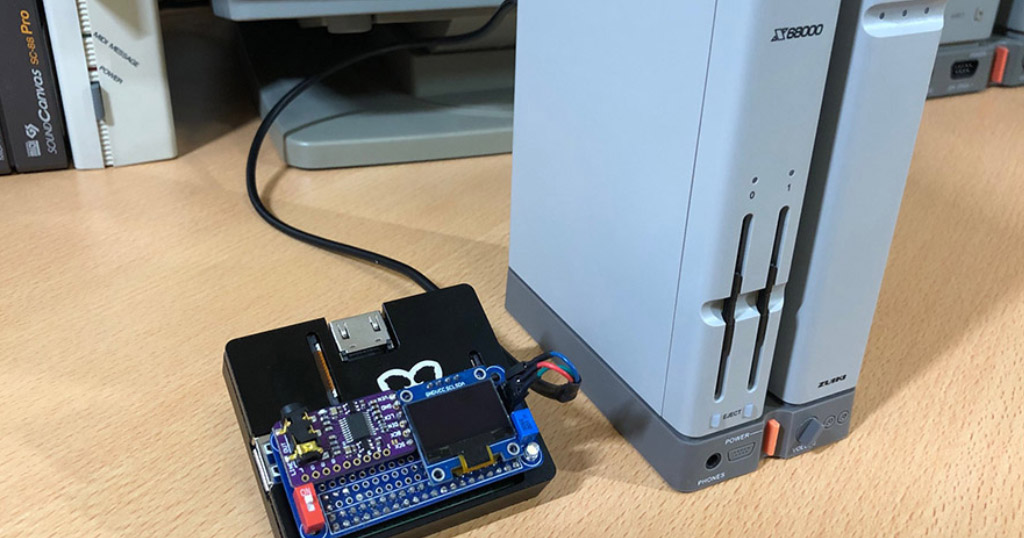
X68000実機でRS232C-UART。
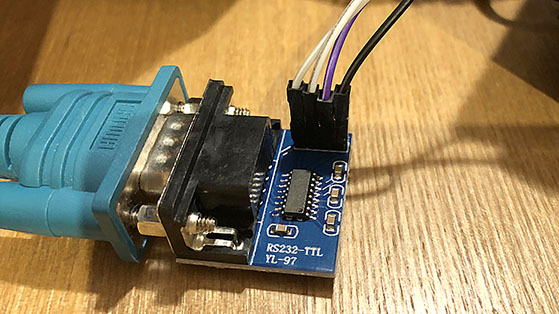
ねこっぴ今回は実機で実験。RS-232Cケーブルに RS-232C-UART変換をつけて試すにゃ。
 ぴぽこ
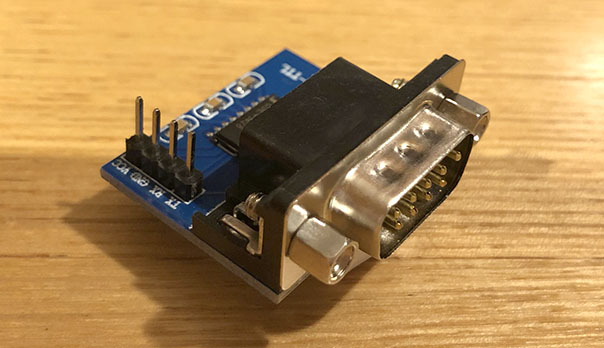
ぴぽこでも、上の製品 UARTとは書いてないね。TTL? 調べてみましょう。
TTLレベルのシリアル通信(調歩同期)でデータを伝送することをUARTやUART通信と呼ぶこともあるようです。
ねこっぴ少し心配にゃけど、たぶん大丈夫…と信じたい。続けるにゃ!
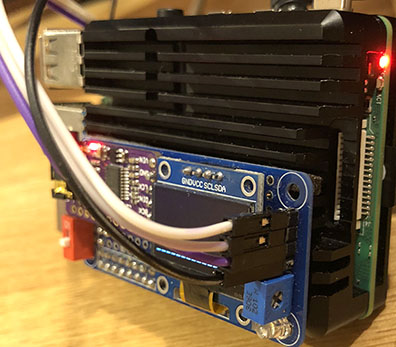
ぴぽこ端子4本あるね。VCCとか。なんか電源必要?
 ねこっぴ
ねこっぴこの製品のamazonとこにあったやつ拝借。3V3って書いてある。
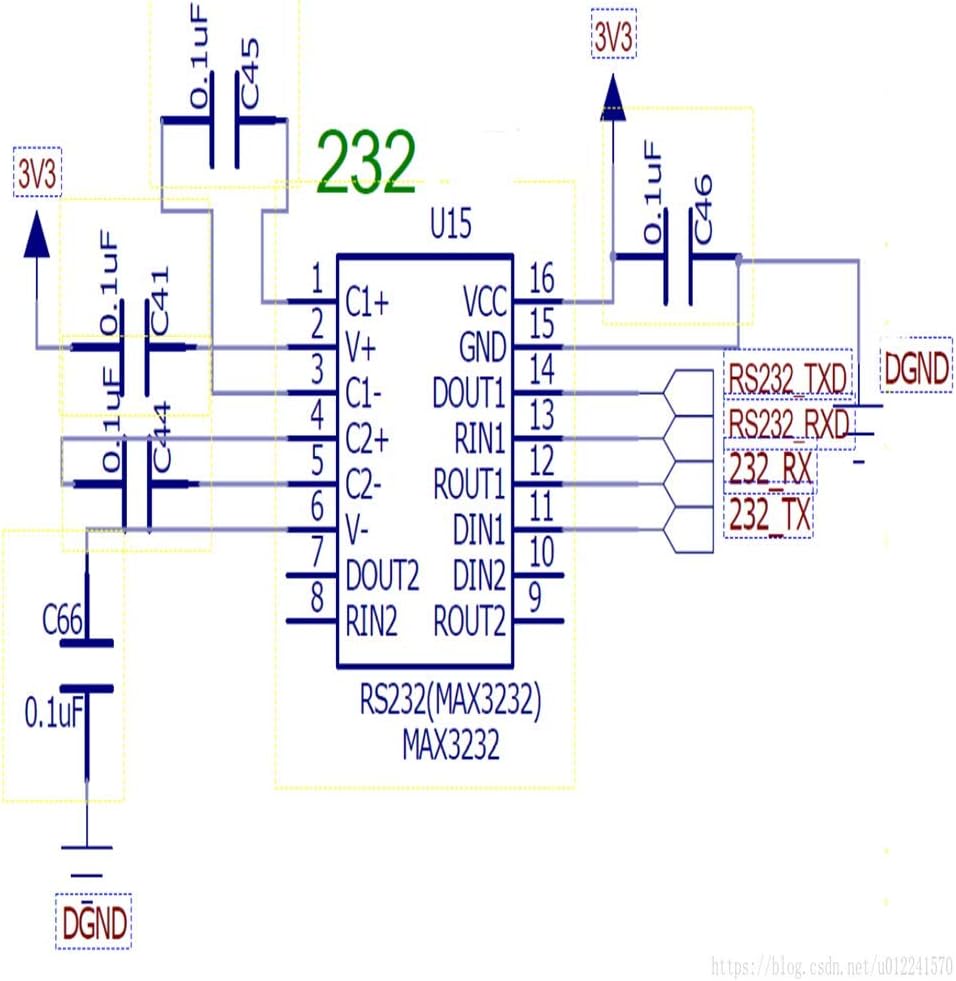
ぴぽこ3,3Vの場合、~ 回路図やプリント基板上では「3V3」と書かれることがあります。ツールラボさんのサイトより。
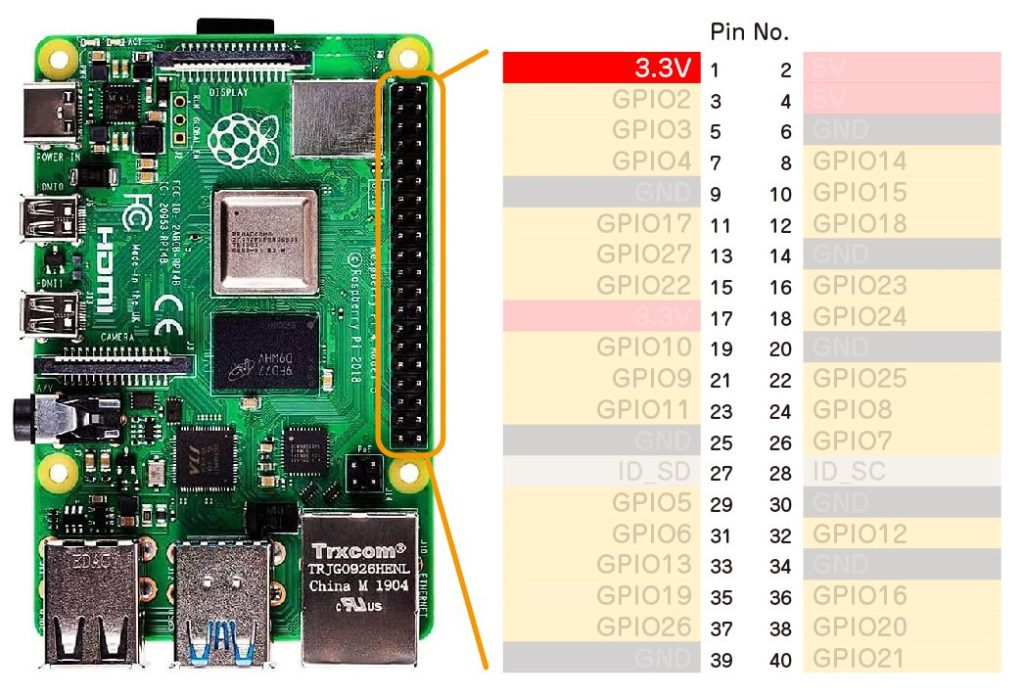
ねこっぴおっけー。3.3Vを作るのなにげに大変。ラズパイのもういっこの3.3Vを表に出しちゃお。よし、パパはんだ付けしちゃうぞ。えいっ
 ぴぽこ
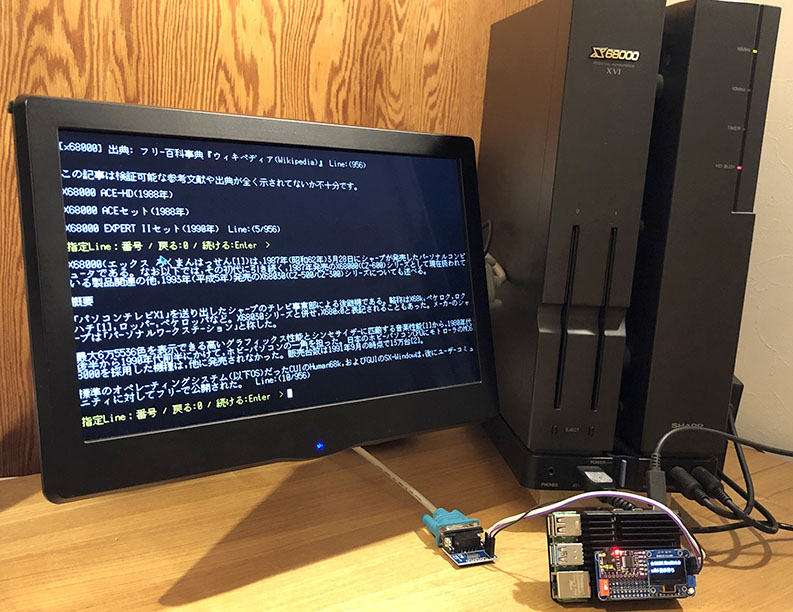
ぴぽこ接続かんりょー!
無事 実機で動作!!
ねこっぴRasNet (文字通信) OK, mt32-pi再生OKです!
 ぴぽこ
ぴぽこ今回はスムーズにいきましたー!
やったね!!
- X68000Z UARTでなにができるの?
- X68000Zを動かしてみよう! X-Basic準備
- どのラズパイを選べばいいかな?
- ラズパイUART設定とケーブル接続
- ラズパイとのUART接続確認テスト
- MIDI再生専用FDを作成(mt32pi)
- MIDI再生専用FDを作成(ttymidi)
- mt32-piでラズパイをMIDI音源にする
- MIDIハード音源を試す
- DACとちびモニターを用意する
- X68uartRasModuleの製作 準備編
- X68uartRasModuleの製作 組立編
- アップデートとHDDの設定
- SX-Window HDDにインスト
- SX-Window MIDI演奏設定
- SX-Window MIDIハード音源設定
- プログラミング編 X-Basicになれてみる
- プログラミング編 Pythonに少し慣れてみる
- プログラミング編 UARTでX68kZからラズパイを操作!
- シェルスクリプトSW分岐とLチカ
- ちびモニタとLEDを制御する!
- ttymidiのUSBの関連付け自動
- Python実行形式にするPyInstaller
- Winkipedia/2chSC閲覧 X68k RasNet
- X68000Zの基本操作などのまとめ
- 番外編はTOPから!